ESP32 MACROPAD
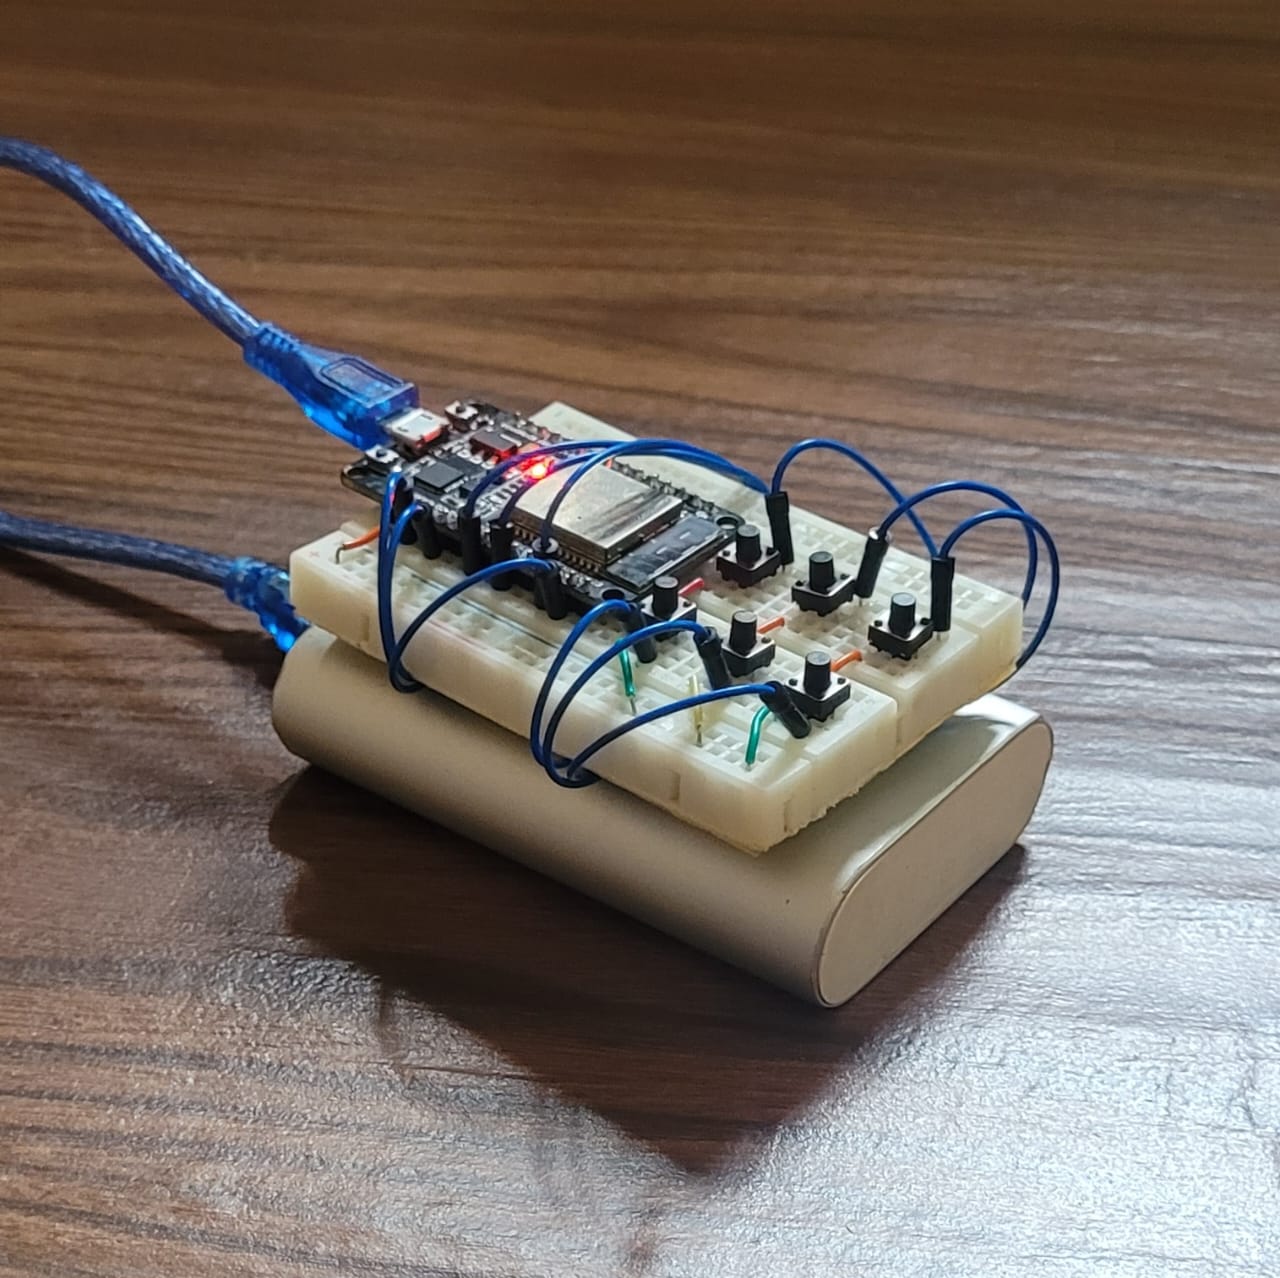
A macropad is a physical device with buttons that are mapped to some customizable functions. It is used to enhance productivity, for navigating software, playing games or all of these at once. I have made my own version of it using the blekeyboard library and the esp32.
Components used
- ESP32 Microcontroller - This handles all the logic and connects to the computer with bluetooth.
- 6 Push Buttons - These are the triggers for the functions.
- A breadboard - To mount the esp32 and pushbuttons.
- A Powerbank - To power the esp32.
How it works
-
Connecting to bluetooth:
The esp32 connects to the computer/mobile through bluetooth to send information.Serial.println("Starting BLE work!"); bleKeyboard.begin();
-
Main loop:
When a device connects to the esp32, the main loop begins running. When a button is pressed, the assigned function is carried out like opening an app or increasing the volume. These functions are fully customisable. For example this function opens up task manager:if (digitalRead(button3Pin) == LOW) { Serial.println("Sending Ctrl + Shift + Esc..."); bleKeyboard.press(KEY_LEFT_CTRL); bleKeyboard.press(KEY_LEFT_SHIFT); bleKeyboard.press(KEY_ESC); delay(100); bleKeyboard.releaseAll(); }The functions that i have assigned to my keyboard are:
- ALT + TAB to switch windows
- Windows + D to minimize all windows
- CTRL + SHIFT + ESC to open or focus task manager
- Command to open browser with windows search
- Volume up
- Volume down
We dont have to set single commands either we can make it carry out an entire list as well. For example, the 4th button on my macropad triggers the windows button, types opera into the keyboard and triggers the enter button to open a new window all with the push of a button. There are endless possibilities for this sort of customization, We can open entire workflows too.
Note: The device is powered by a 10000mAh power bank, this could power the esp32 for a long time despite the bluetooth communication which consumes a lot of resources.
- Some issues
The project didnt go very smooth, I encountered a few problems. On searching for the right library for the project, I came across the ESP32-BLE-Keyboard in github. The library didn’t work at first, it turns out that it was using std::str in its code instead of String and substr instead of substring. So I edited the library and the program started working. To make sure you don’t run into the same issues change the text I did in both BleKeyboard files inside the library folder with the help of notepad or some other text editor.
Features to add
The device has so much room for improvement some of the features we can add to make it better are:
- Casing
- Oled display or LEDs
- App or website for customization
- More inputs like potentiometer
- Smaller size
- Better buttons
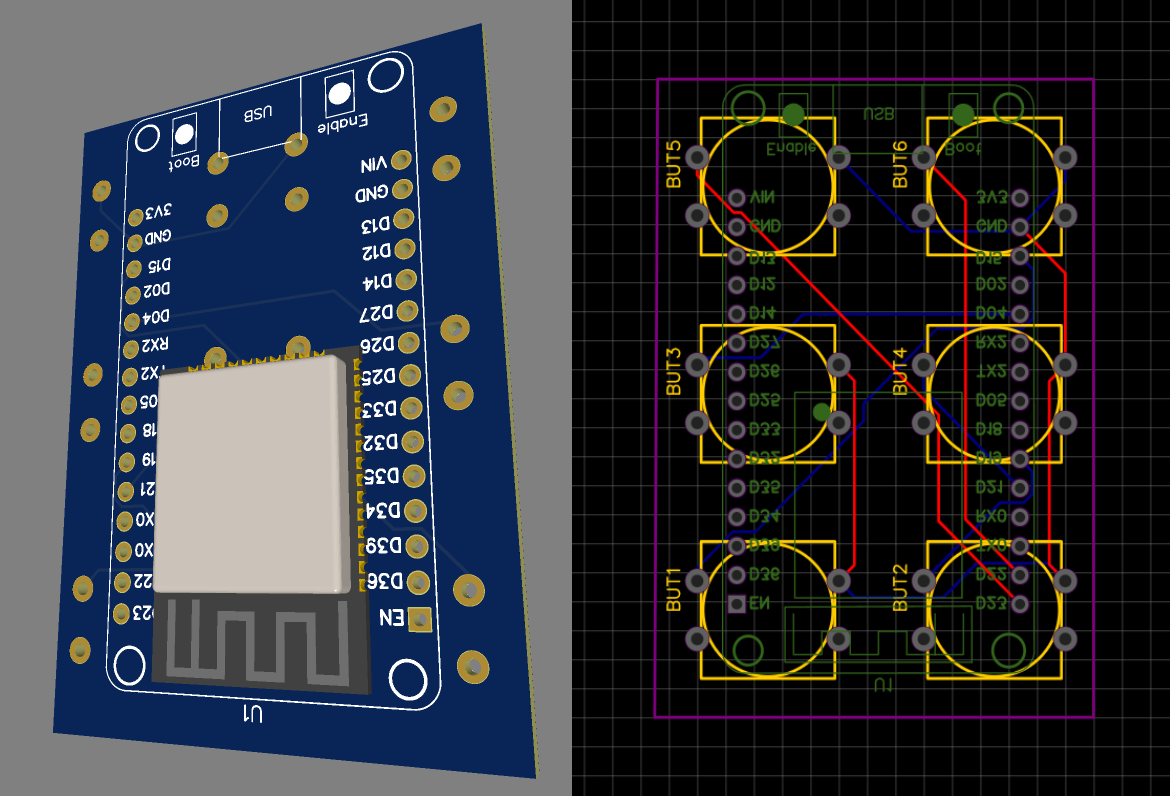
- custom pcb
Code
1
2
3
4
5
6
7
8
9
10
11
12
13
14
15
16
17
18
19
20
21
22
23
24
25
26
27
28
29
30
31
32
33
34
35
36
37
38
39
40
41
42
43
44
45
46
47
48
49
50
51
52
53
54
55
56
57
58
59
60
61
62
63
64
65
66
67
68
69
70
71
72
73
74
75
76
77
78
79
80
81
82
83
84
85
86
#include <BleKeyboard.h>
// Button pins
const int button1Pin = 15;
const int button2Pin = 2;
const int button3Pin = 4;
const int button4Pin = 21;
const int button5Pin = 22;
const int button6Pin = 23;
BleKeyboard bleKeyboard;
void setup() {
Serial.begin(115200);
pinMode(button1Pin, INPUT_PULLUP); // Alt + Tab
pinMode(button2Pin, INPUT_PULLUP); // Minimize all windows
pinMode(button3Pin, INPUT_PULLUP); // Task Manager
pinMode(button4Pin, INPUT_PULLUP); // Open Browser
pinMode(button5Pin, INPUT_PULLUP); // Volume Up
pinMode(button6Pin, INPUT_PULLUP); // Volume Down
// Initialize BLE keyboard
Serial.println("Starting BLE work!");
bleKeyboard.begin();
}
void loop() {
if (bleKeyboard.isConnected()) {
if (digitalRead(button1Pin) == LOW) {
Serial.println("Sending Alt + Tab...");
bleKeyboard.press(KEY_LEFT_ALT);
bleKeyboard.press(KEY_TAB);
delay(80);
bleKeyboard.releaseAll();
delay(150);
}
if (digitalRead(button2Pin) == LOW) {
Serial.println("Minimizing all windows...");
bleKeyboard.press(KEY_LEFT_GUI);
bleKeyboard.press('d');
delay(100);
bleKeyboard.releaseAll();
}
    if (digitalRead(button3Pin) == LOW) {
    Serial.println("Sending Ctrl + Shift + Esc...");
    bleKeyboard.press(KEY_LEFT_CTRL);
    bleKeyboard.press(KEY_LEFT_SHIFT);
    bleKeyboard.press(KEY_ESC);
    delay(100);
    bleKeyboard.releaseAll();
  }
if (digitalRead(button4Pin) == LOW) {
Serial.println("Sending command to open browser");
bleKeyboard.write(KEY_LEFT_GUI);
delay(45);
bleKeyboard.print("opera");
delay(50);
bleKeyboard.write(KEY_RETURN);
delay(50);
bleKeyboard.releaseAll();
}
if (digitalRead(button5Pin) == LOW) {
Serial.println("Sending Volume Up...");
bleKeyboard.press(KEY_MEDIA_VOLUME_DOWN);
delay(10);
}
if (digitalRead(button6Pin) == LOW) {
Serial.println("Sending Volume Down...");
bleKeyboard.press(KEY_MEDIA_VOLUME_UP);
delay(10);
}
}
delay(50);
}
Conclusion
This project was pretty fun to make, i can use it in my daily life. Macropads are usually very expensive from 30 to 100 dollars but my project costed only $5.48, so my friends are pretty jealous of me.